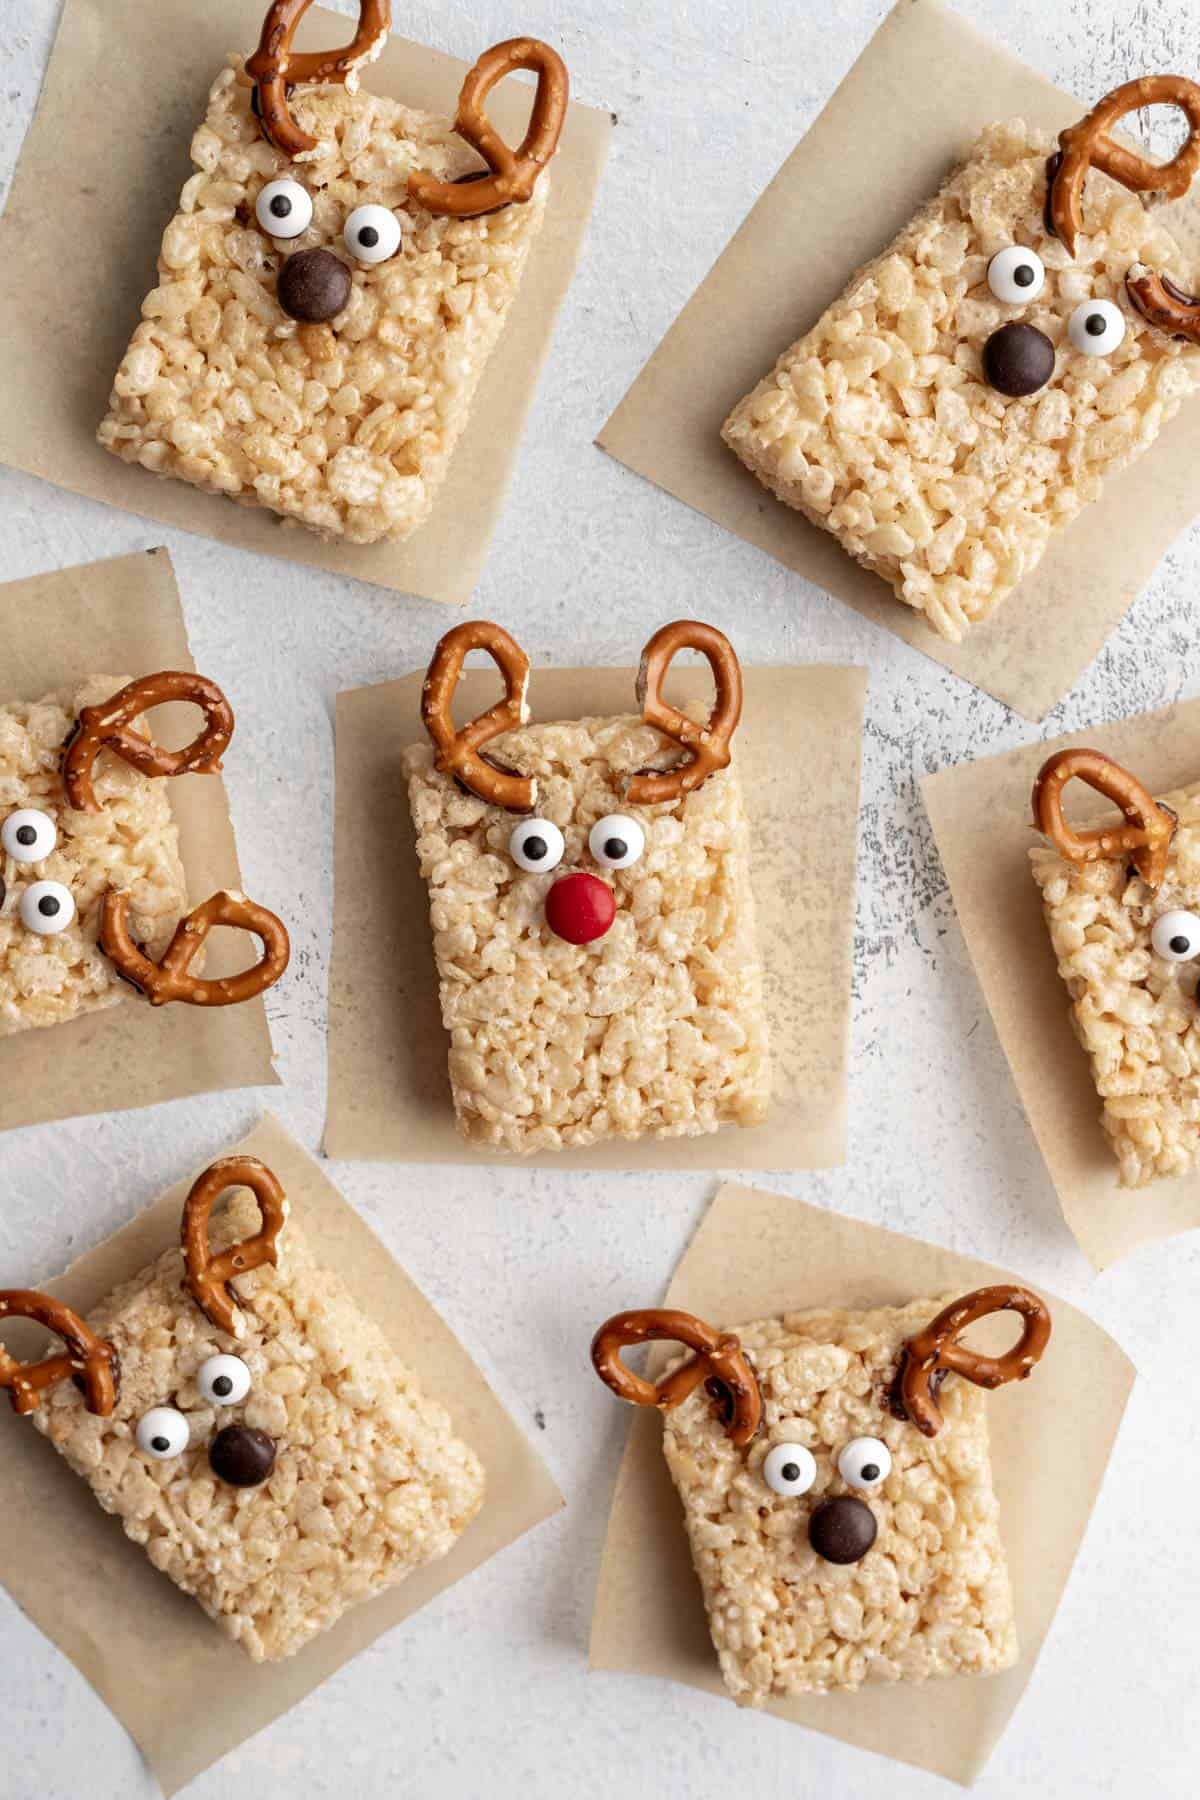
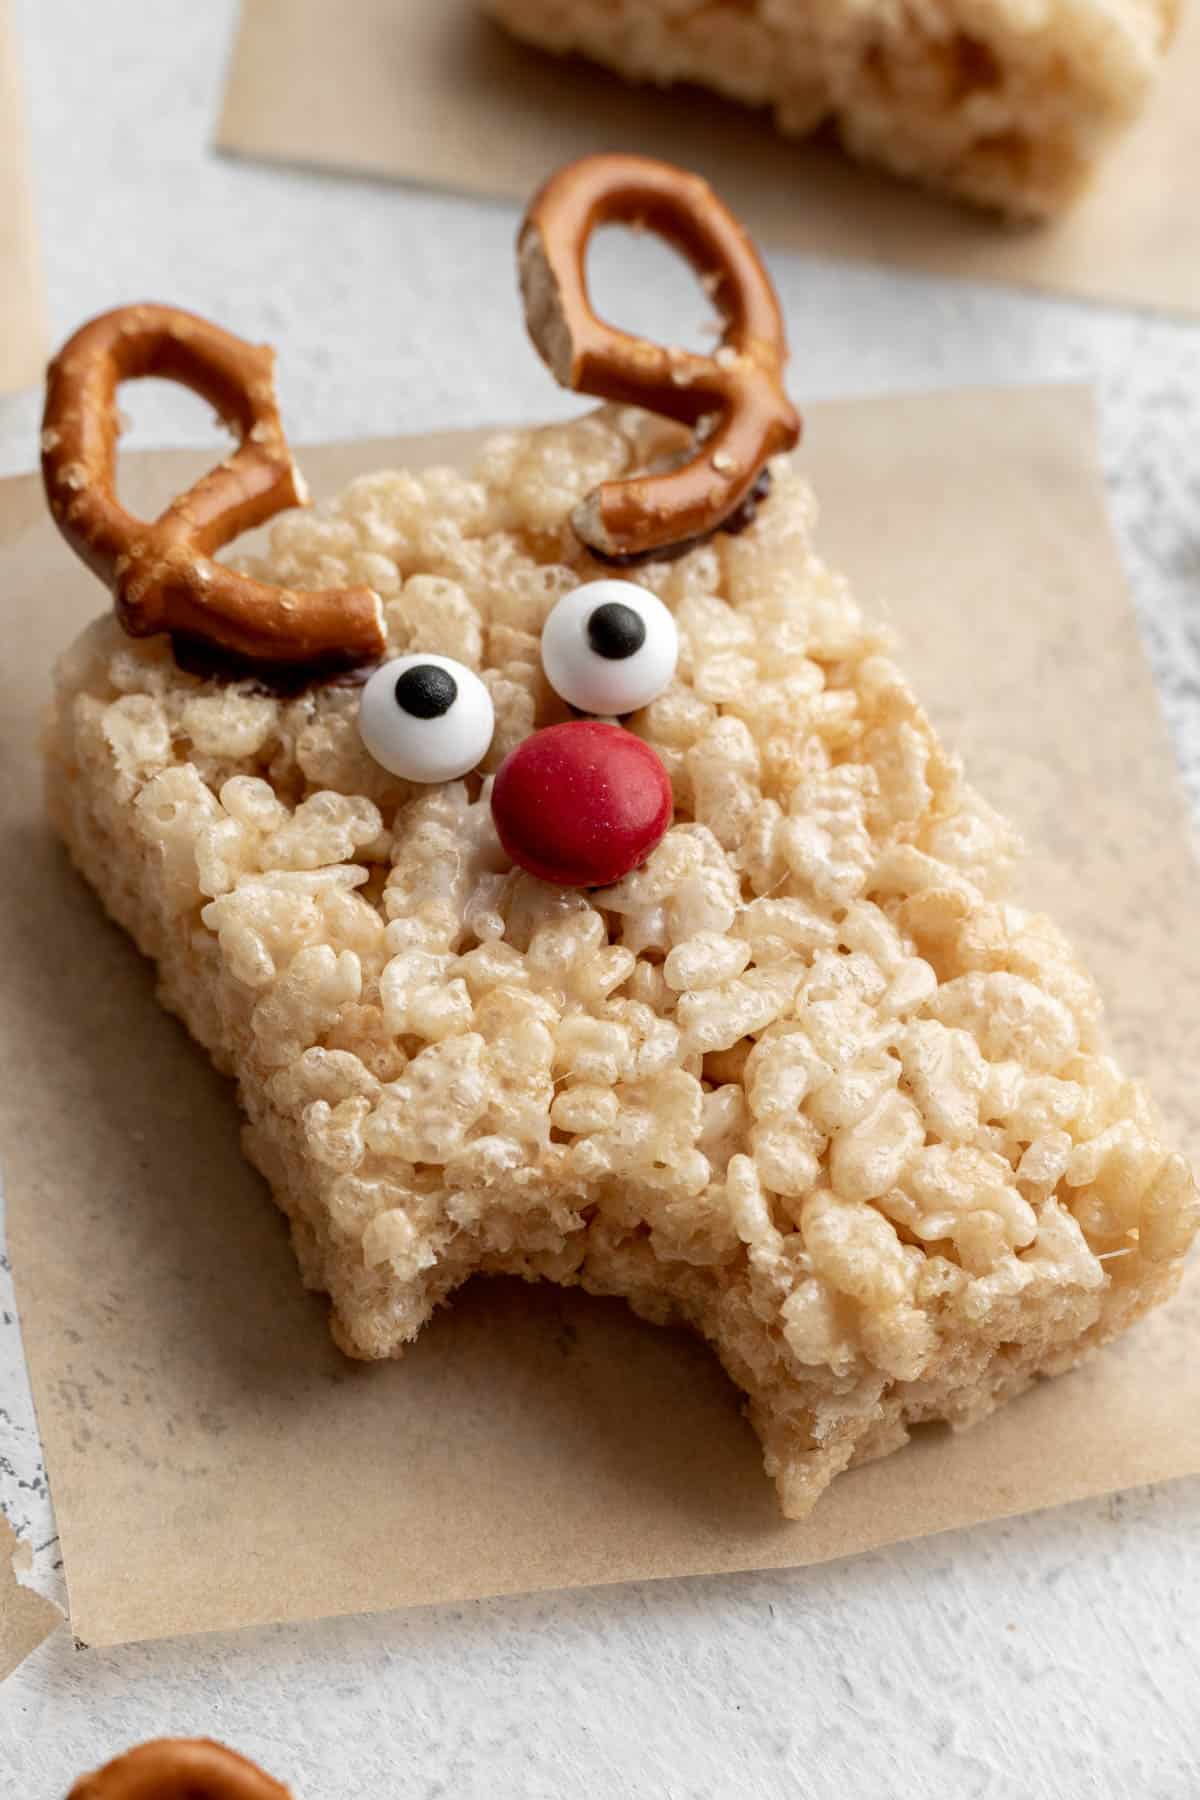
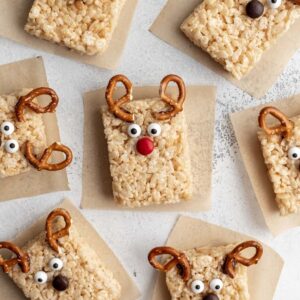
These Reindeer Rice Krispie Treats are the cutest, no-bake holiday treat! Make this simple dessert for ALL your Christmas parties or as an edible gift idea. All you need is 9 ingredients and about 30 minutes.
Jump to:
📋 About the Recipe
- Start to finish, these no-bake reindeer treats are ready in just over 30 minutes. Great for hosting, school events, and last minute holiday gifting. Make these reindeer pretzels to go along with them!
- Make-ahead friendly! These reindeer treats remain fresh, soft, and chewy days after baking.
- The addition of vanilla extract elevates the flavor, making these so much tastier than store bought.
- Great kid friendly Christmas activity! Prepare the rice krispie treats ahead of time, then allow your kids to decorate them as reindeer for a fun, edible craft.
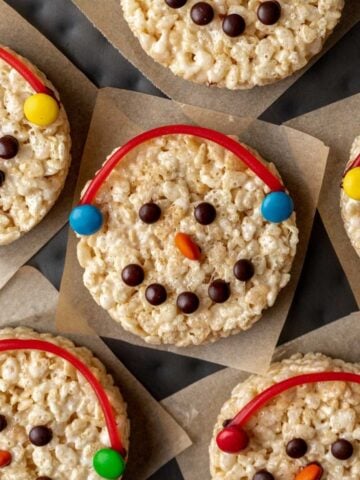
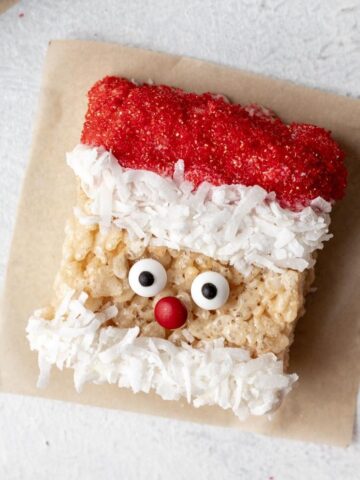
- These reindeer treats go perfectly with my other seasonal snacks: Santa Rice Krispie Treats, Candy Cane Rice Krispie Treats, and Snowman Rice Krispie Treats.
🛒 Ingredients
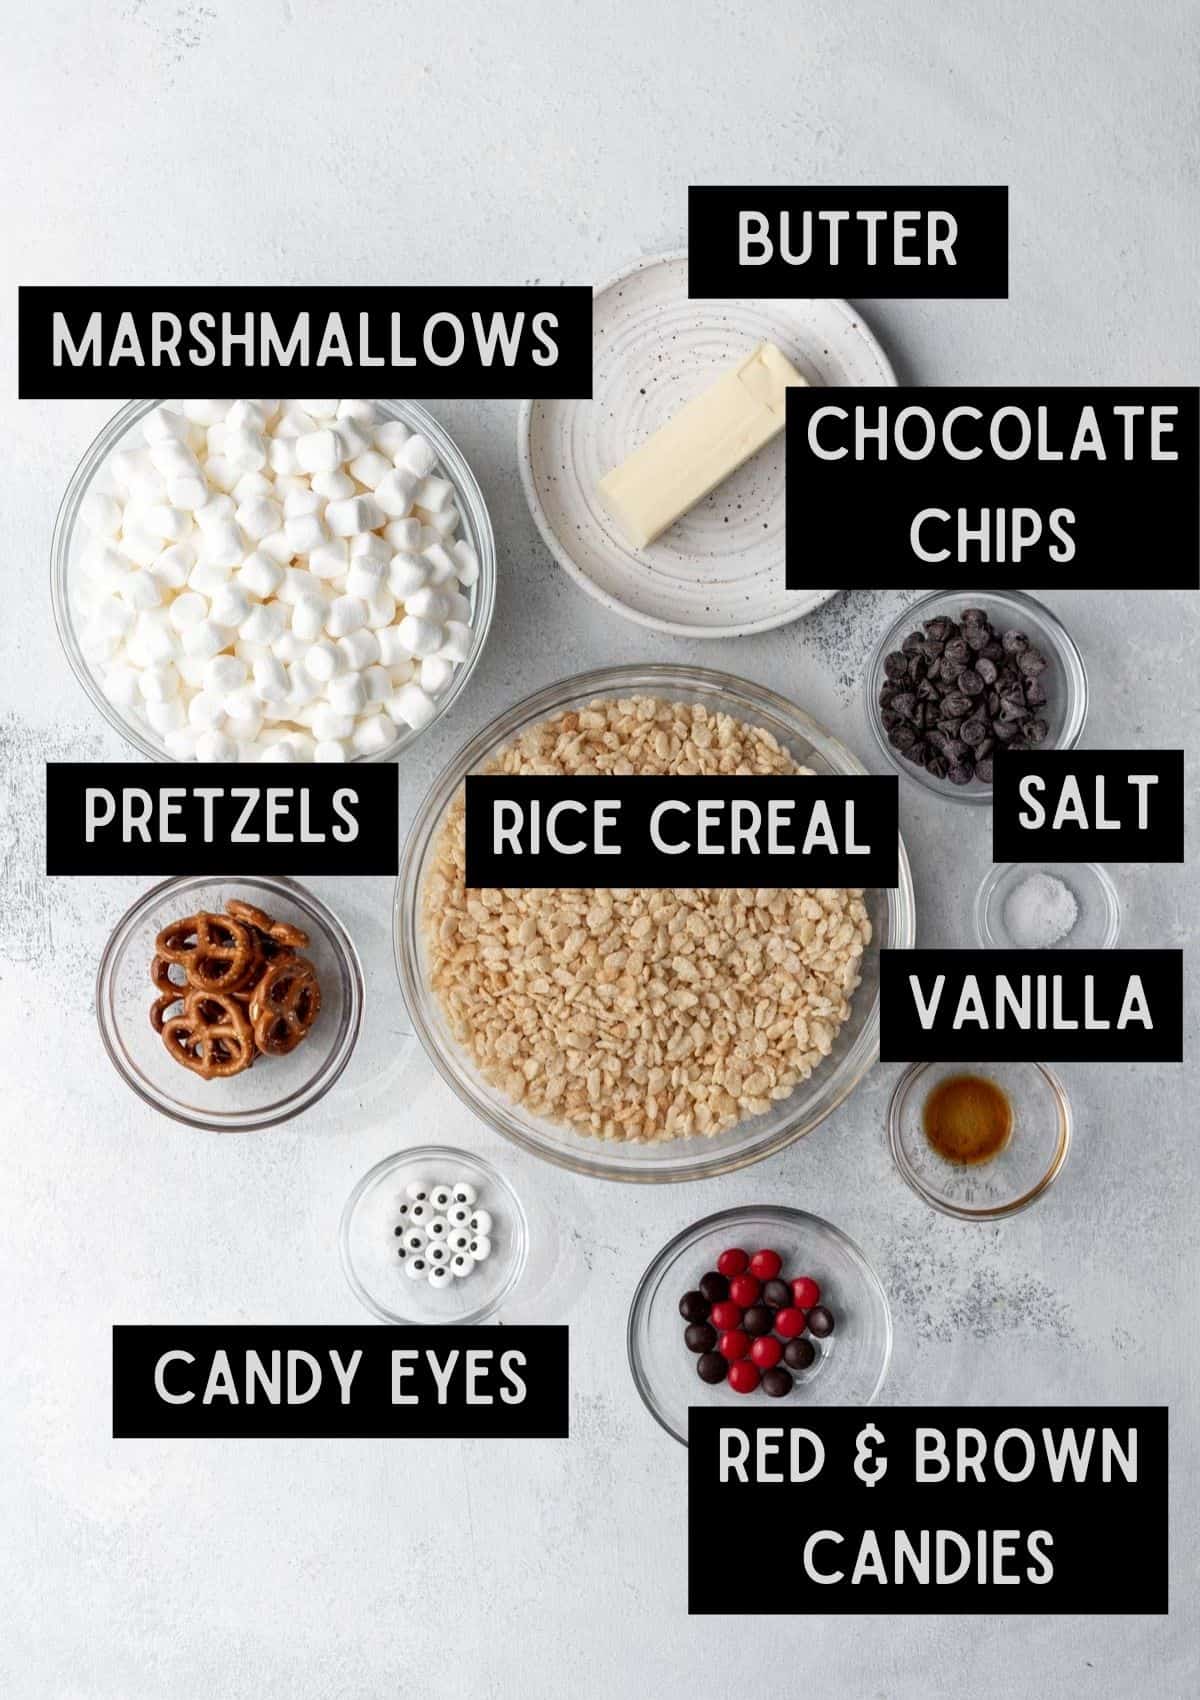
A few notes about the ingredients:
- Rice cereal - A crucial component in any rice krispie treat! Be sure to use the full amount of rice cereal. Using too little will prevent the treats from fully setting and using too much will prevent the treats from properly sticking together.
- Marshmallows - Another essential. Marshmallows are the key to making them soft, gooey, and fluffy!
- Butter - Adds a rich, creamy flavor and keeps the reindeer treats moist and chewy.
- Chocolate chips - Melted chocolate chips act as the glue that sticks the eyes, nose, and pretzel antlers on the reindeer! I use semi-sweet chocolate chips, however any melted chocolate will do.
- Candies - To create the reindeer nose, I used red and brown chocolate M&Ms. Chocolate is neutral in flavor and compliments the butteriness of the treats well.
📓 Instructions
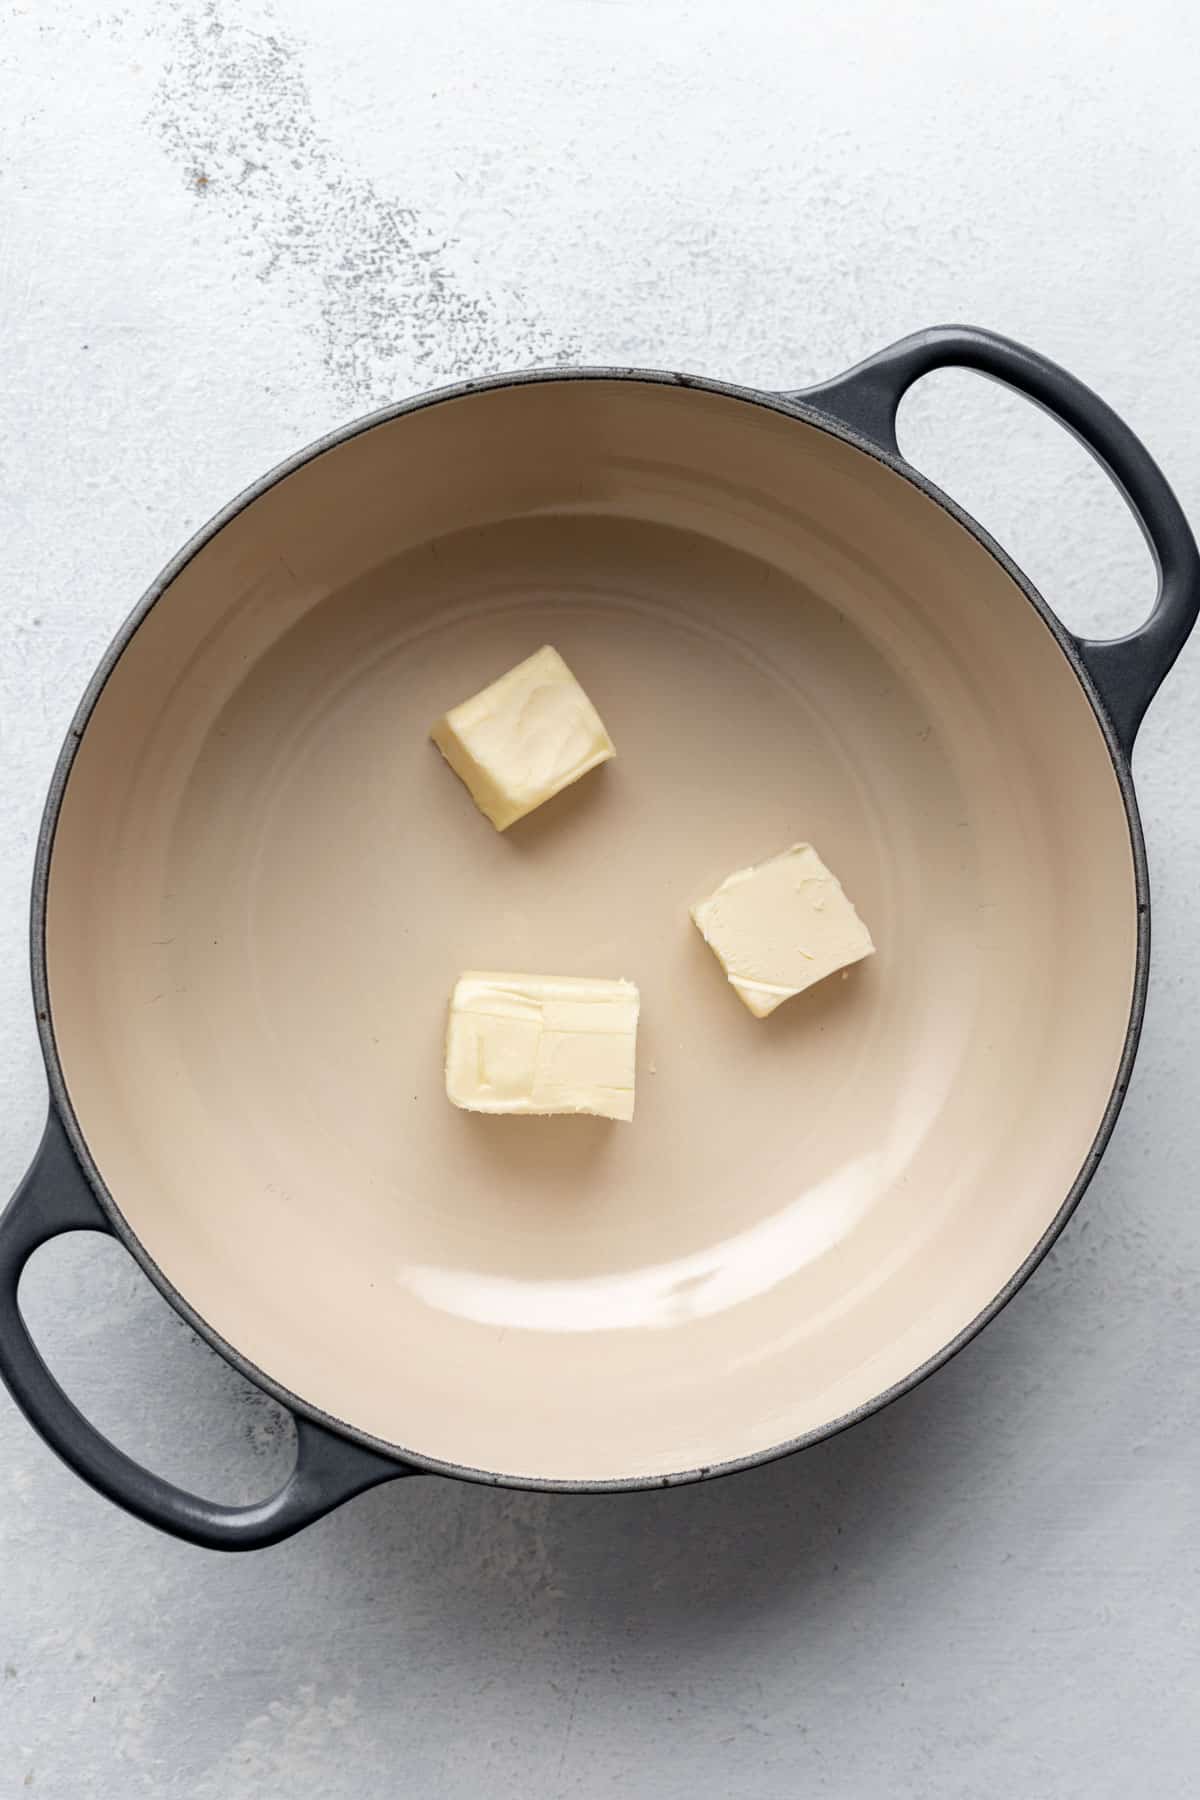
1. Prepare a 9x13 baking pan by spraying it with nonstick spray and adding parchment paper to the bottom for easy removal.
2. In a large pot, melt the butter over medium-low heat. Once the butter is almost completely melted, add the marshmallows.
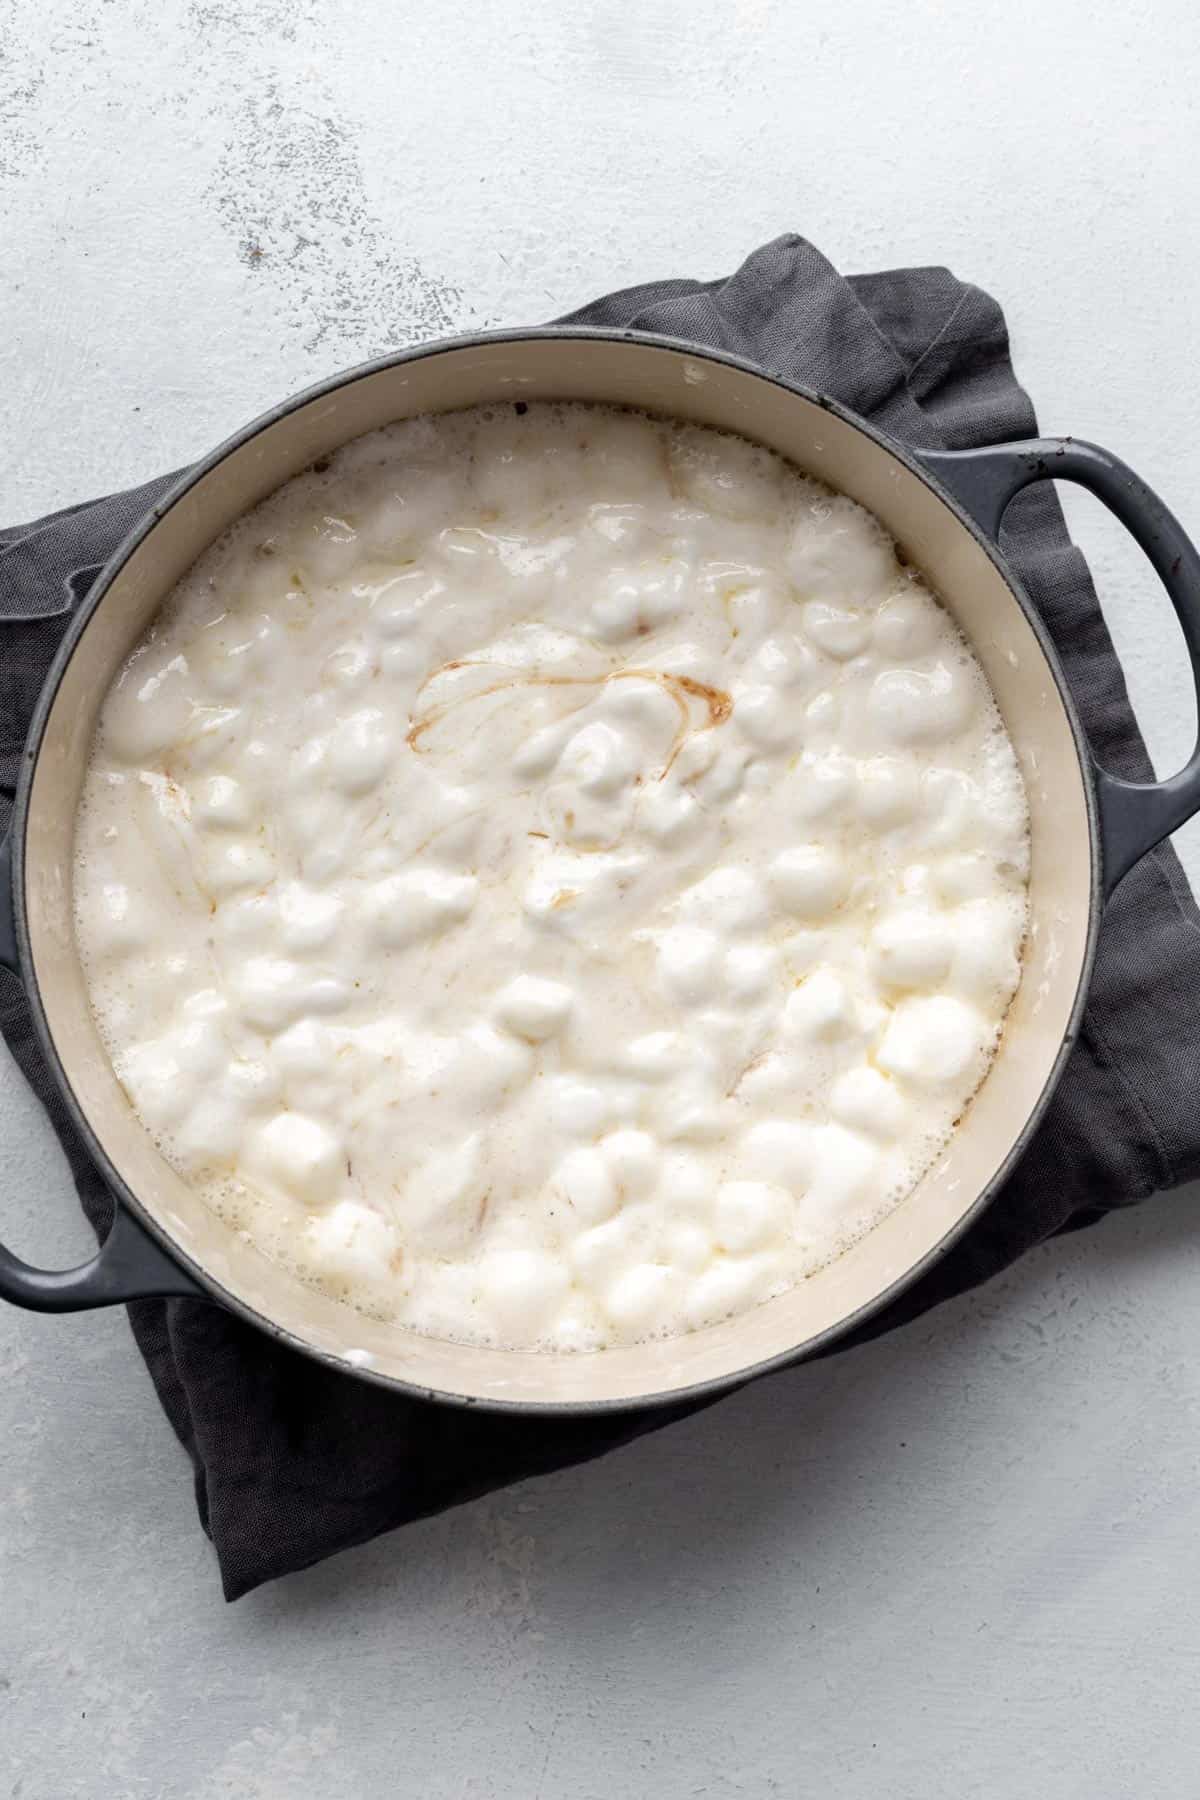
3. Stir to coat the marshmallows fully in the butter. Cook for 5 to 8 minutes, stirring intermittently until the marshmallows melt completely. Don't overcook, as this will cause the mixture to burn and the marshmallows to harden.
4. Remove the pot from the heat. Stir in vanilla extract and salt.
5. Pour in the cereal. Stir to fully combine, making sure to scrape any additional marshmallows from the bottom of the pot.
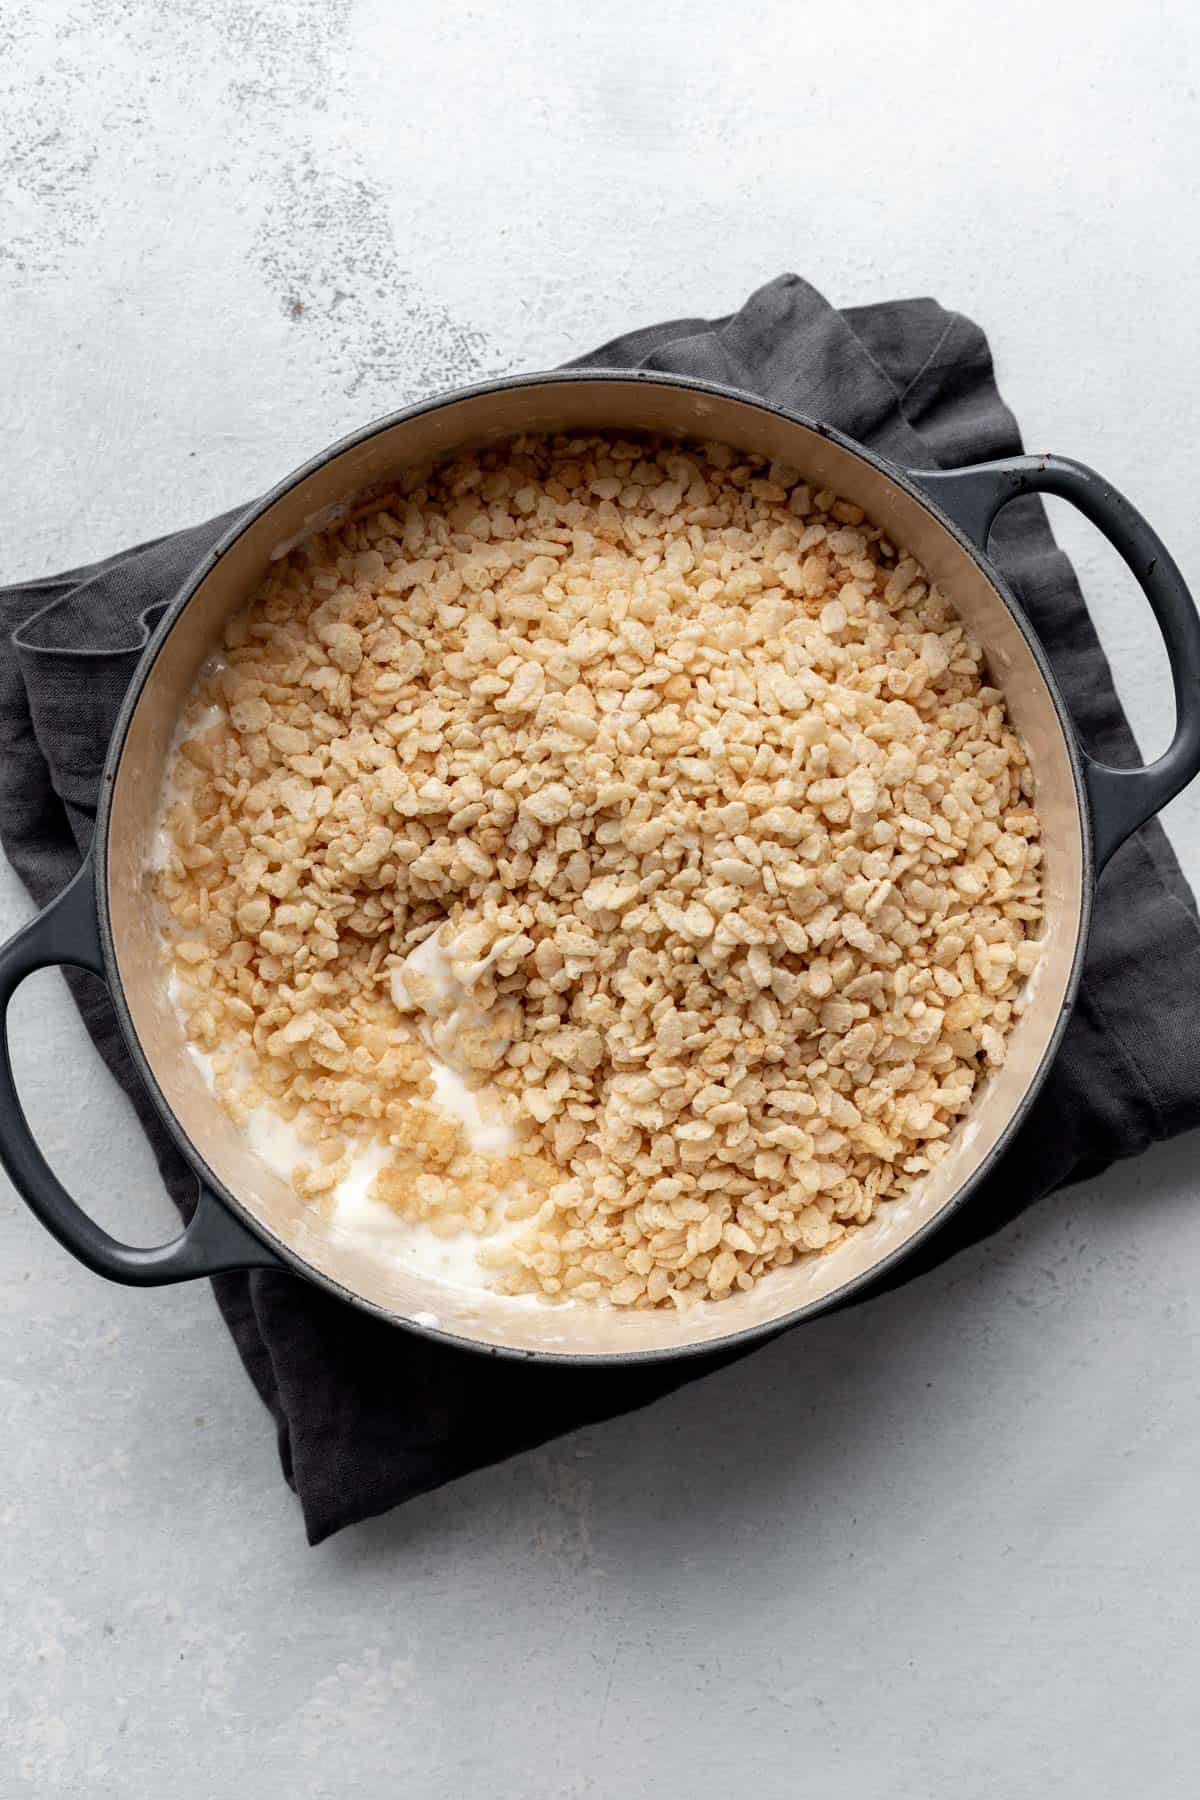
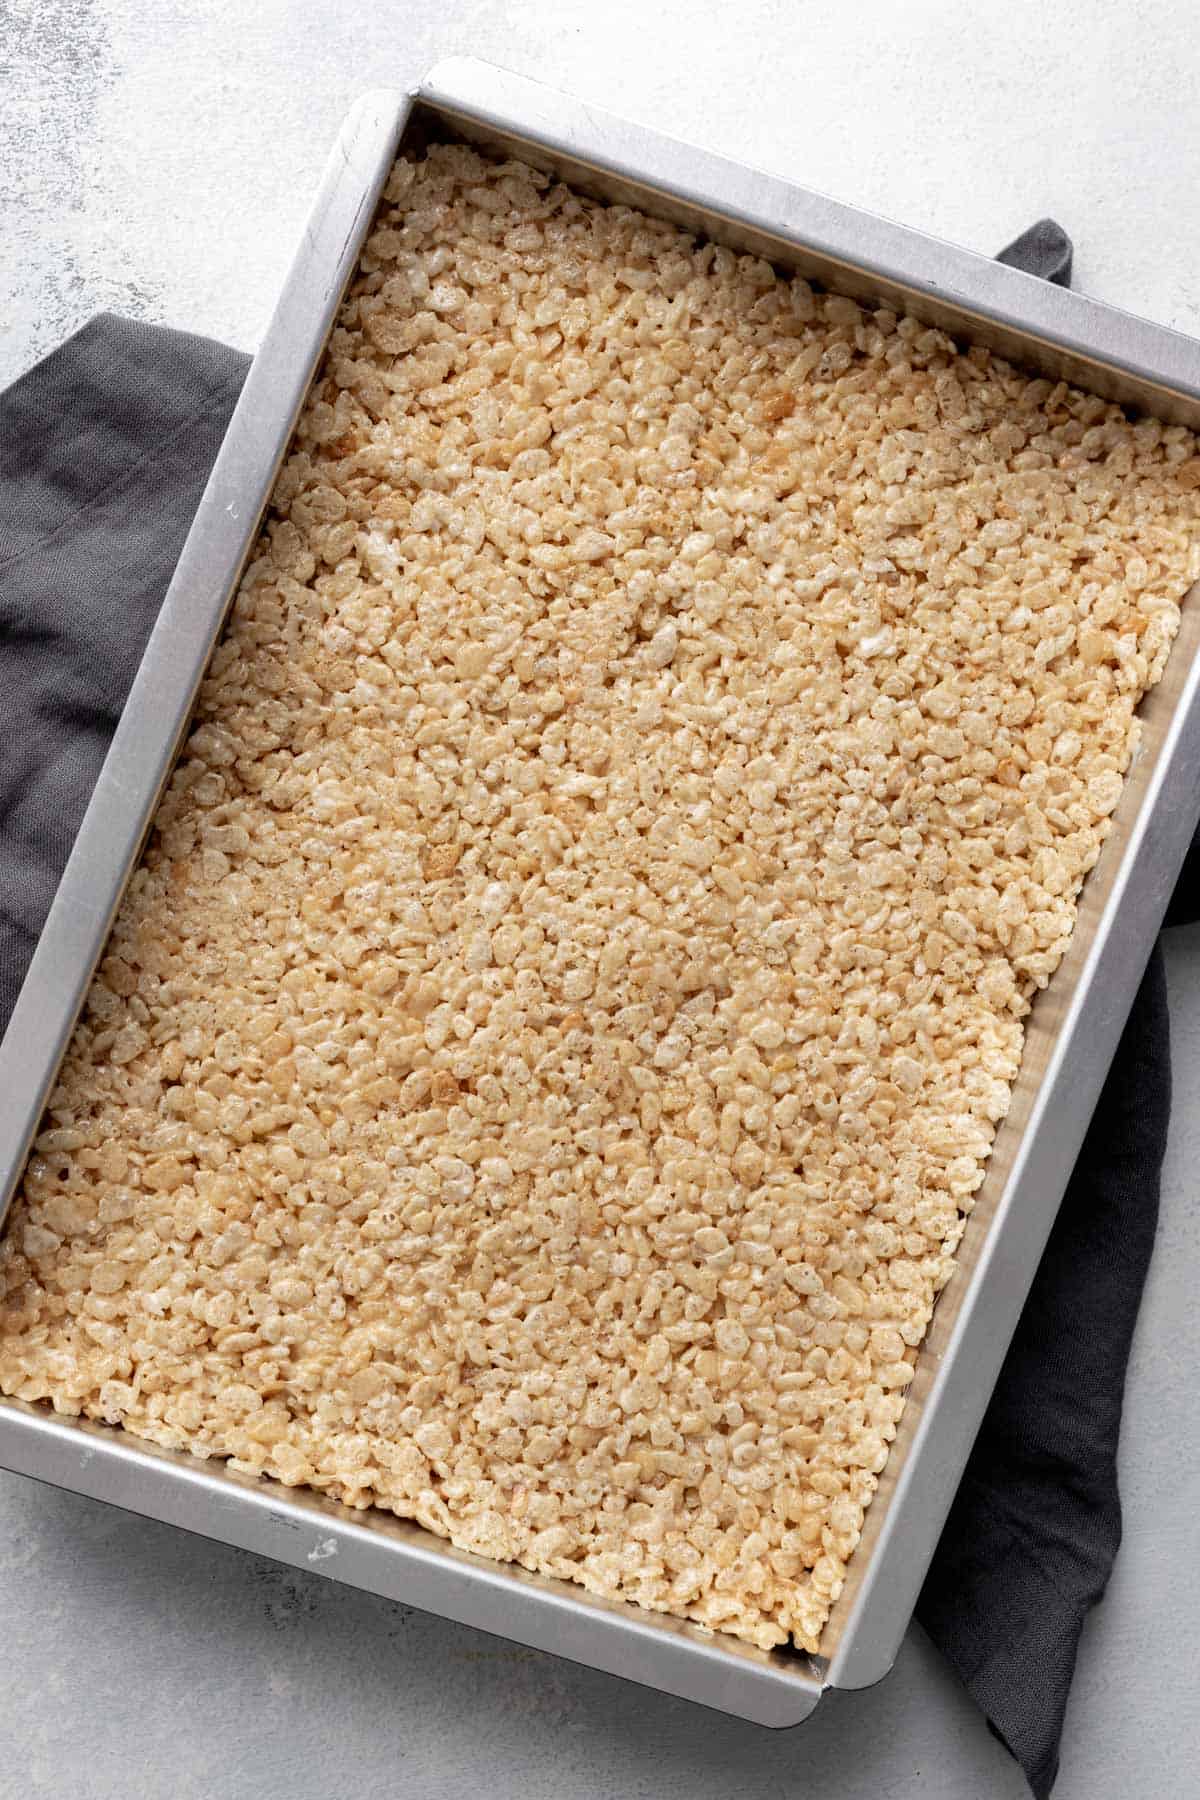
6. Dump out the cereal and marshmallow mixture into the 9x13 baking pan. Using a greased spoon, spread out evenly from edge to edge.
7. Allow the rice krispie treats to cool and slightly harden for about 15 minutes before slicing into 15 even-sized rectangles.
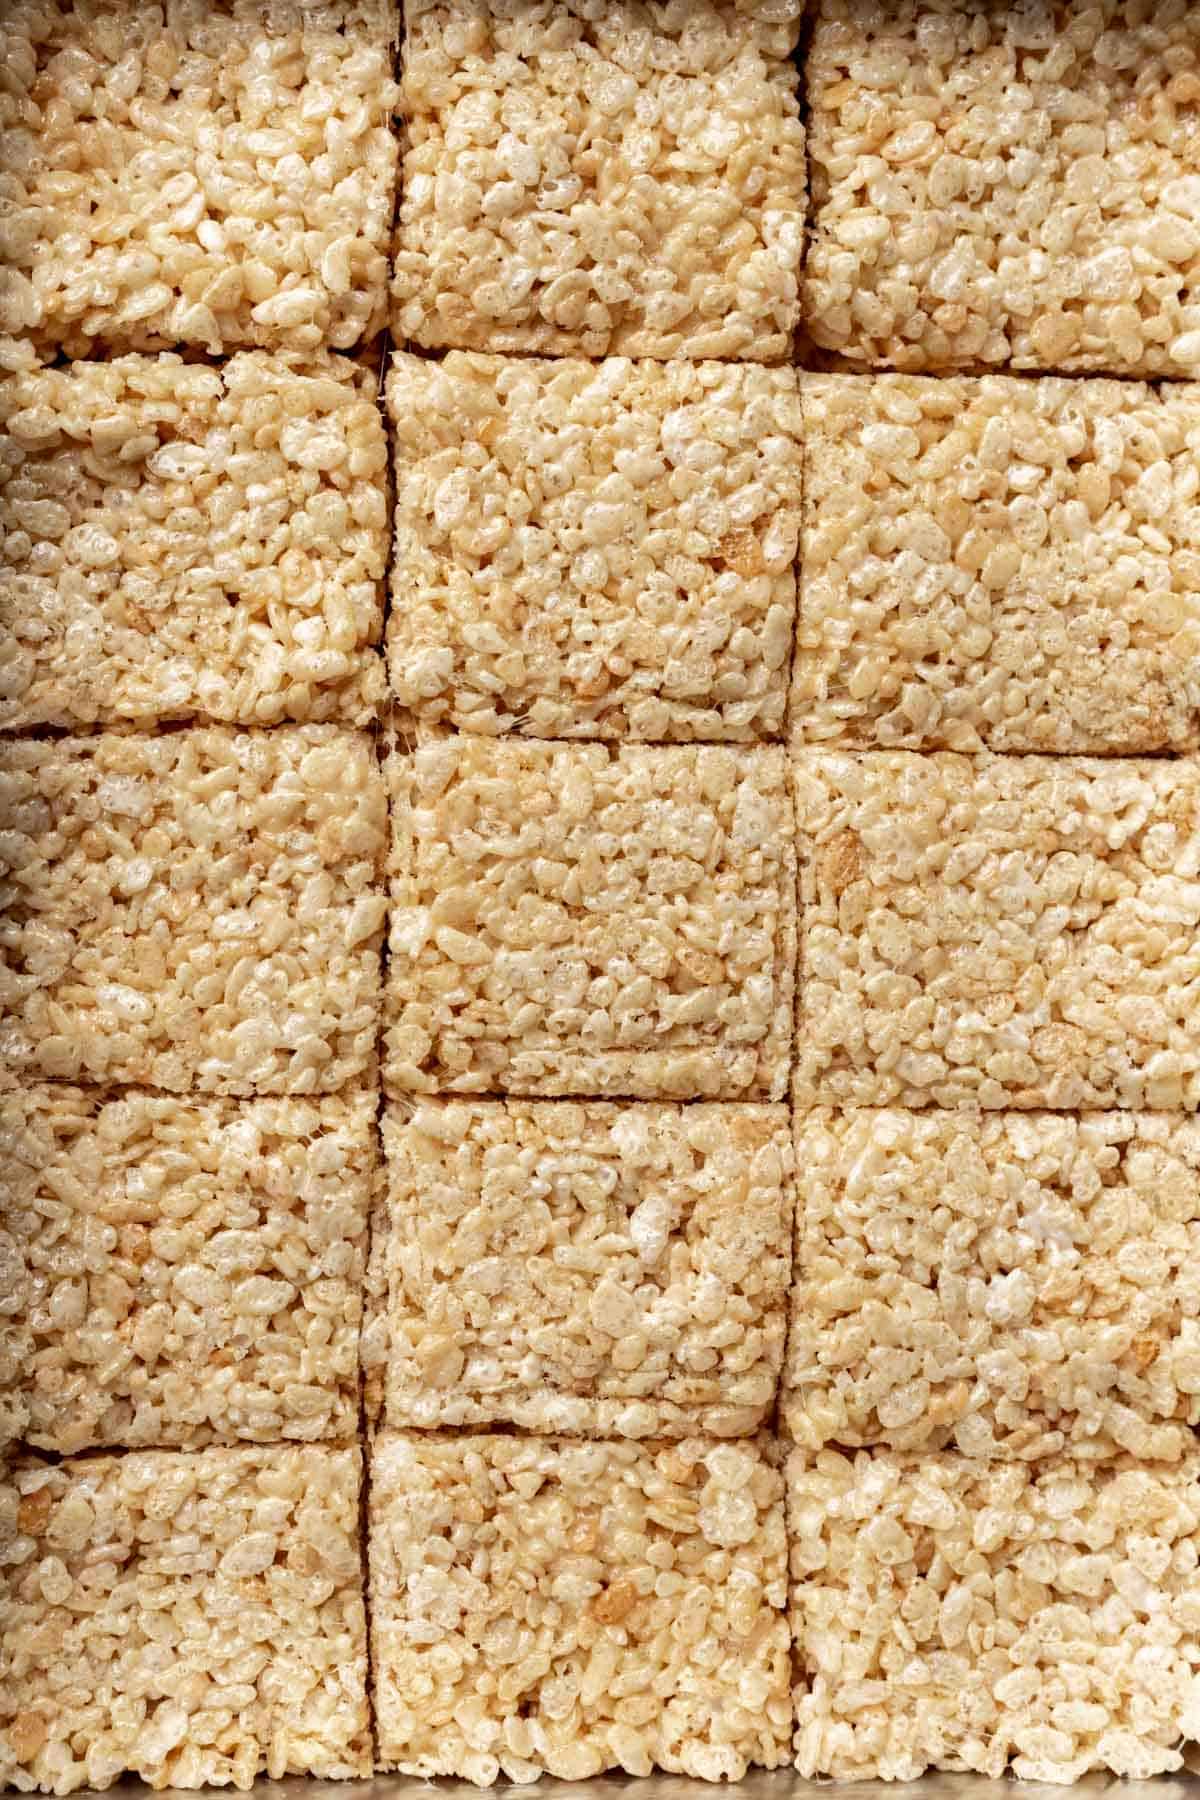
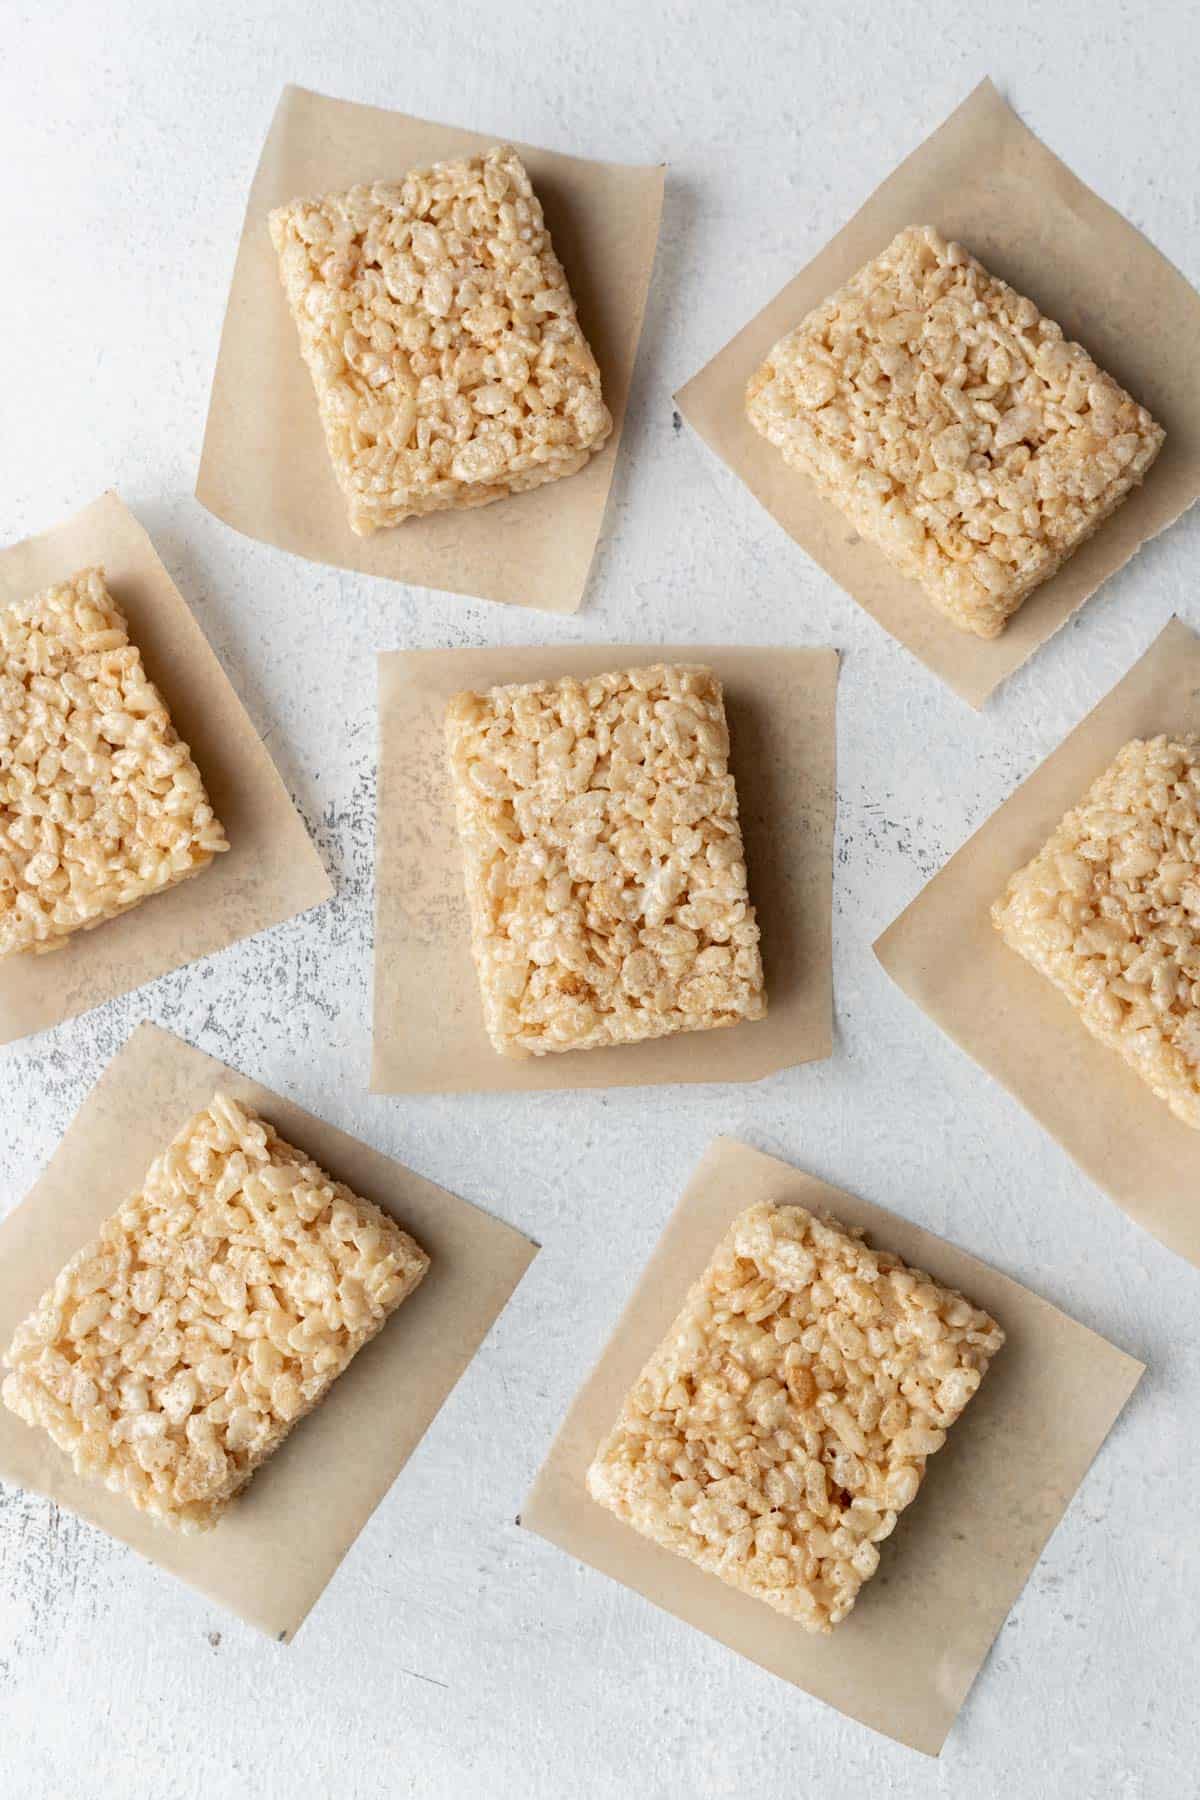
8. Remove them from the baking pan and use your hands to mold them into evenly shaped rectangles.
9. Add chocolate chips to a plastic zip-top bag. Melt in 30 second intervals in the microwave until smooth. Snip a small corner off the bag. Use the melted chocolate as the glue to hold on the other decorations.
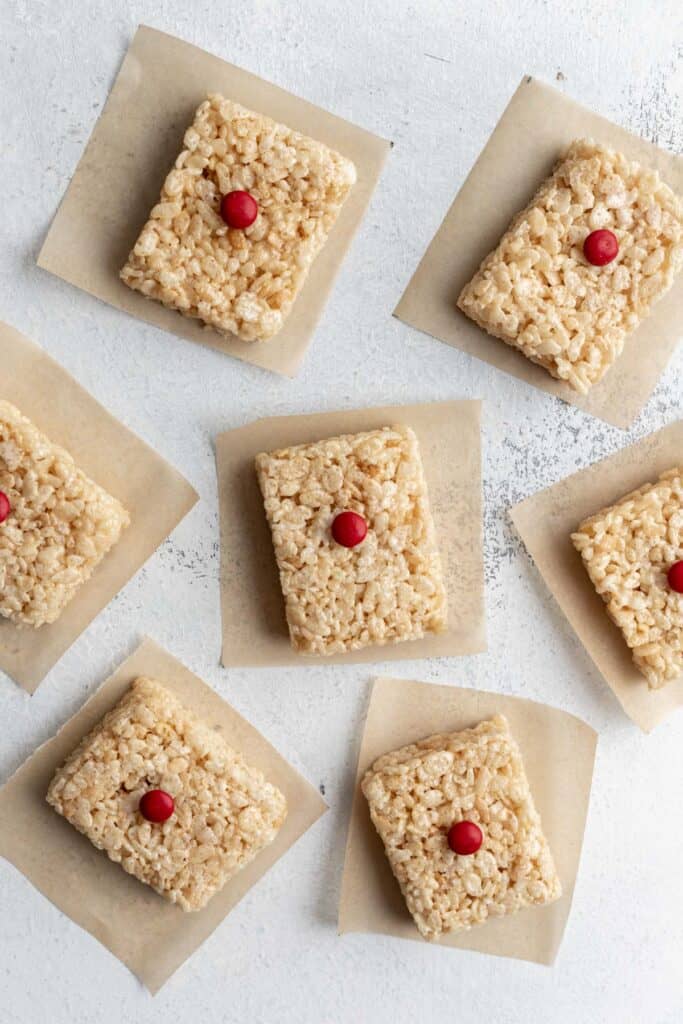
10. Place a small dot of melted chocolate in the upper center of the rice krispie treats and quickly press the red candy into the chocolate until it sticks. (If using a candy like m&m's with a noticeable logo, flip them upside down so only the plain side is showing.)
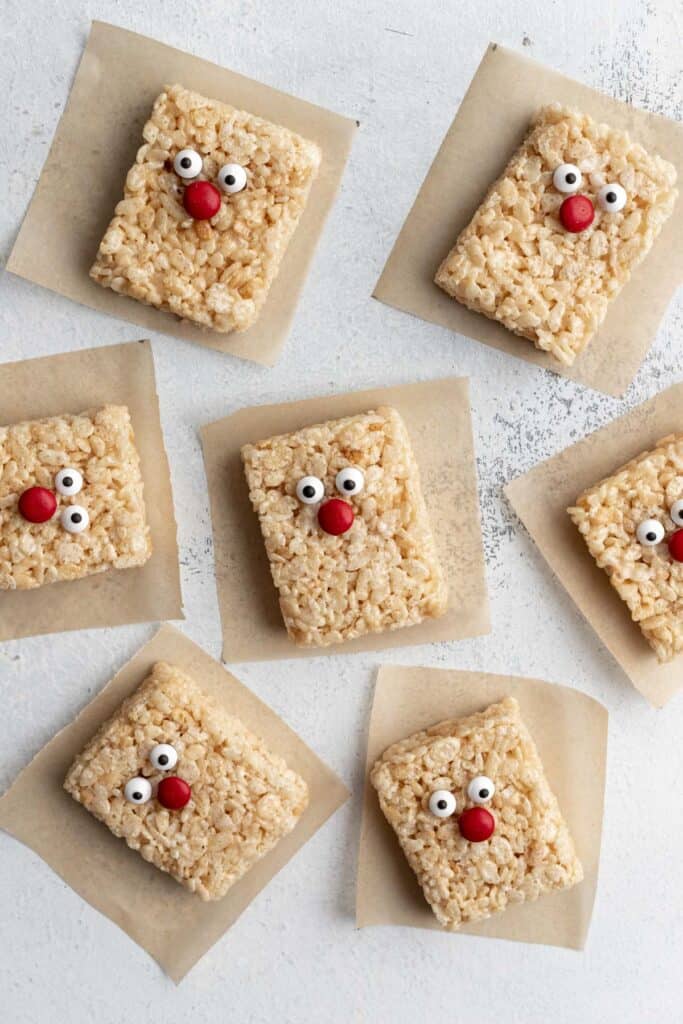
11. Now, add 2 chocolate dots for the eyes right above the red candy. Press the candy eyes into the chocolate until they stick.
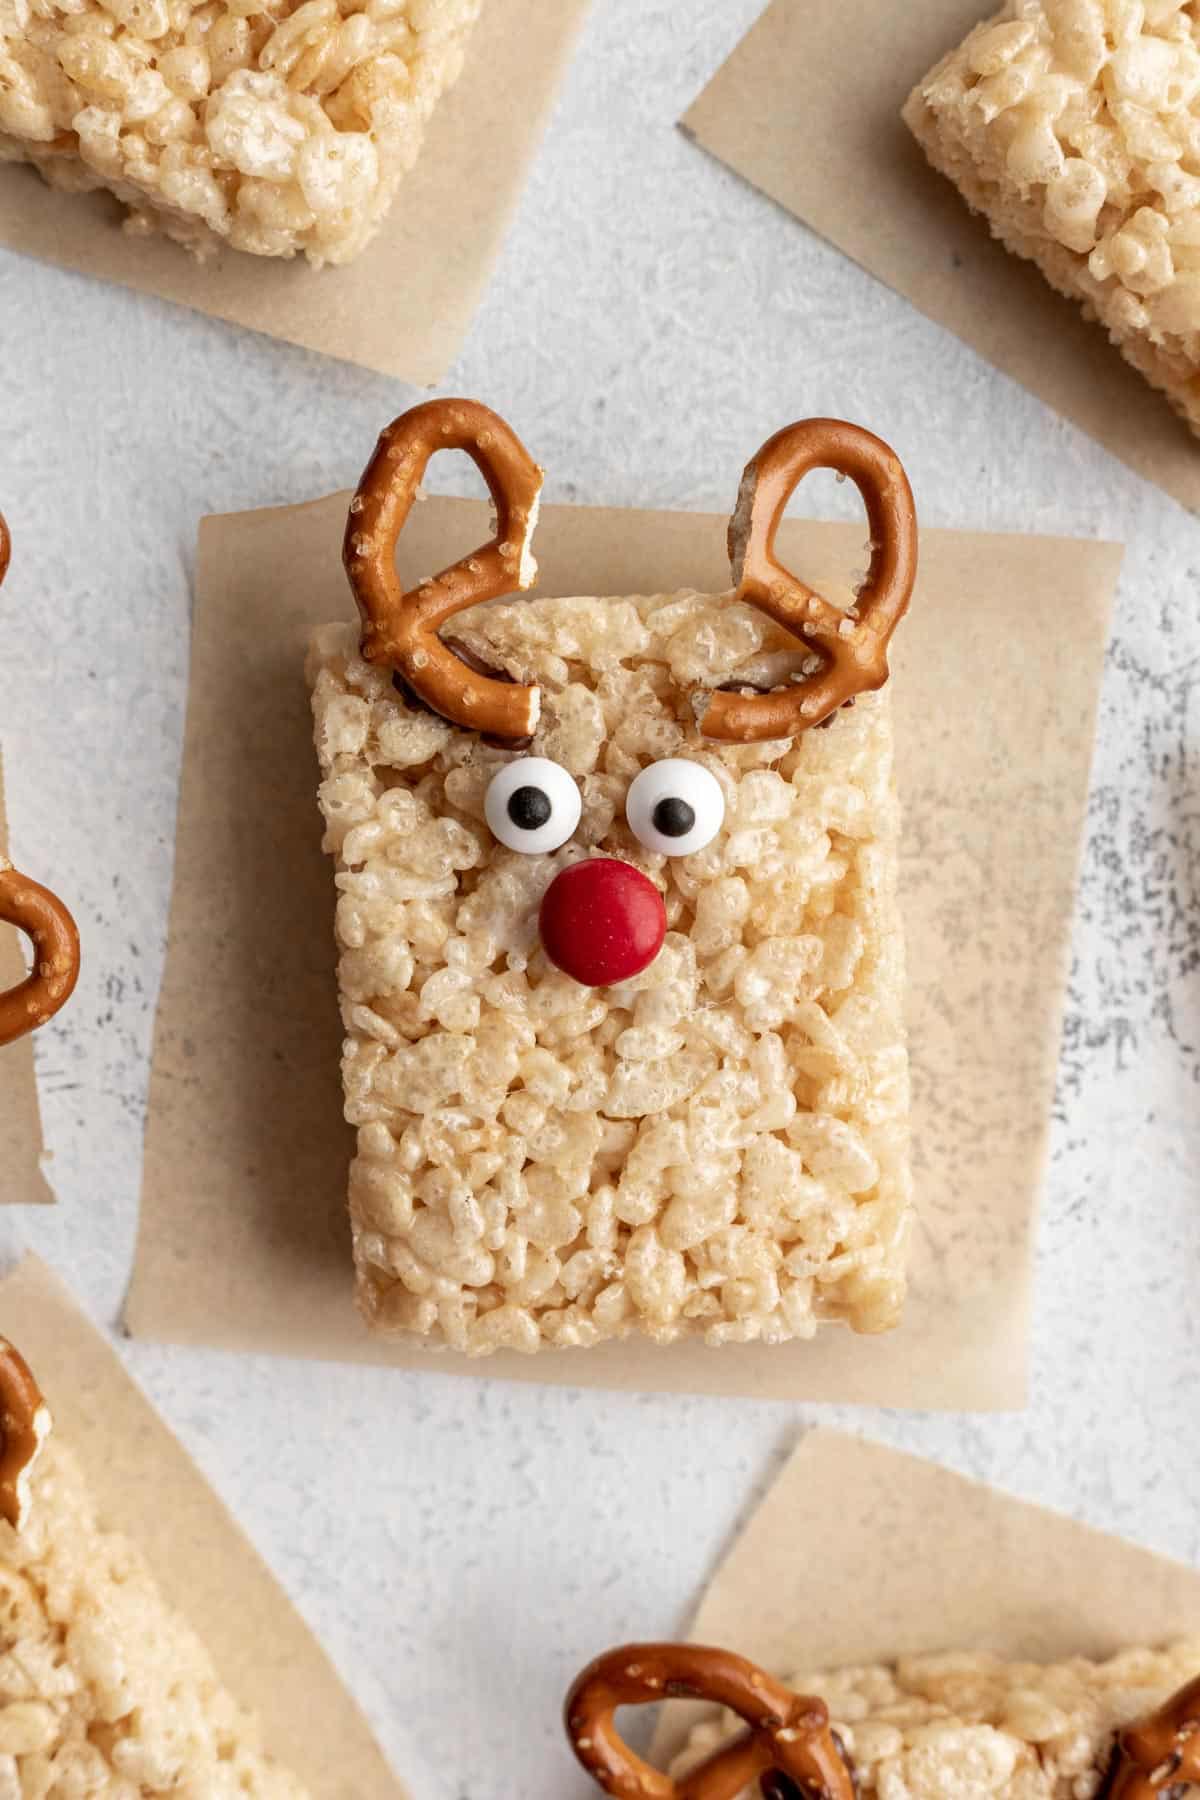
12. Cut or break the pretzels in half to create the reindeer's antlers. You may need more than 15 pretzels, in case any break while cutting.
13. Again, use the melted chocolate to add 2 small lines on top of each treat. Stick the halved pretzels into each line.
14. Allow all the chocolate to harden before moving, stacking, or serving the reindeer.
⁉️ Substitutions and Alterations
- I prefer to use unsalted butter with a half teaspoon of kosher salt, but you can also use salted butter in a pinch - just leave out the kosher salt.
- If you're out of M&Ms, you can use any small red candy like Red Hots or Skittles for the reindeer's nose.
- If you're making these along with my Santa Rice Krispie treats, you can repurpose the white chocolate from that recipe, instead of using the melted chocolate chips to help glue on the reindeer's antlers, eyes, and nose.
❄️ How to Store
To store: For optimal results, store at room temperature in an airtight container for up to 5 days. Refrigeration is not recommended.
To freeze: Freeze in an airtight container or zip-top bag up to 6 months. To defrost, remove from the freezer and allow to come to room temperature for about 15 minutes before serving. You can also speed up the process by microwaving for 15 to 30 seconds to soften.
🔍 FAQs
No, making rice krispie treats with stale cereal is not recommended. If the cereal is stale, the treats will be stale. Same goes for using stale marshmallows. Using fresh ingredients is essential to making the best possible treat.
This recipe is developed with extra butter and marshmallows to ensure a long-lasting, soft treat, but to ensure the softest treat possible, make sure to heat the marshmallows on medium-low. Too high of heat can result in a tough or burnt-tasting treat.
Also, make sure to store any leftover treats in a properly sealed container. If they're not sealed, they may become hard or stale quicker.
Yes, these treats freeze well. Simply store in an airtight container or freezer safe zip-top bag and store in the freezer for up to 6 months.
💭 A Few More Tips
- Keep the heat on medium-low when melting the butter and marshmallows. Using too high of heat can cause the marshmallows to burn or make them too sticky and hard which will result in a hard treat.
- Don't skimp on the butter or marshmallows - this recipe uses more than what the "box instructions" call for so that you have perfectly soft and chewy reindeer rice krispie treats that will last on your counter more than 1 day (if they're not all devoured beforehand).
- Once you've pressed the treats into the 9x13 baking pan, be sure to wait the 15 minutes or so before slicing into squares. This will ensure the treats have set properly and won't fall apart.
- For perfect, neat slicing, lightly spray your knife with cooking spray before slicing. This will prevent sticking.
🍴 Related Recipes

Share your cooking with me! If you make this recipe, I'd love to know! Tag @yourhomemadehealthy on Instagram or leave a comment with a rating and some feedback at the bottom of this page!
Reindeer Rice Krispie Treats
Equipment
Ingredients
- 6 tablespoons unsalted butter
- 15 ounces mini marshmallows (about 1 ½ bags)
- ½ teaspoon vanilla extract
- ½ teaspoon kosher salt
- 8 cups rice cereal such as Rice Krispies
- 2 tablespoons semi sweet chocolate chips
- 15 small red candies (m&m's, red hots, or skittles)
- 30 candy eyes
- 15+ mini pretzels
Instructions
- Prepare a 9x13 baking pan by spraying it with nonstick spray and adding parchment paper to the bottom for easy removal.
- In a large pot, melt the butter over medium-low heat. Once the butter is almost completely melted, add the marshmallows.
- Stir to coat the marshmallows fully in the butter. Cook for 5 to 8 minutes, stirring intermittently until the marshmallows melt completely. Don't overcook, as this will cause the mixture to burn and the marshmallows to harden.
- Remove the pot from the heat. Stir in vanilla extract and salt.
- Pour in the cereal. Stir to fully combine, making sure to scrape any additional marshmallows from the bottom of the pot.
- Dump out the cereal and marshmallow mixture into the 9x13 baking pan. Using a greased spoon, spread out evenly from edge to edge.
- Allow the rice krispie treats to cool and slightly harden for about 15 minutes before slicing into 15 even-sized rectangles.
- Remove them from the baking pan and use your hands to mold them into evenly shaped rectangles.
- Add chocolate chips to a plastic zip-top bag. Melt in 30 second intervals in the microwave until smooth. Snip a small corner off the bag. Use the melted chocolate as the glue to hold on the other decorations.
- Place a small dot of melted chocolate in the upper center of the rice krispie treats and quickly press the red candy into the chocolate until it sticks. (If using a candy like m&m's with a noticeable logo, flip them upside down so only the plain side is showing.)
- Now, add 2 chocolate dots for the eyes right above the red candy. Press the candy eyes into the chocolate until they stick.
- Cut or break the pretzels in half to create antlers. You may need more than 15 pretzels, in case any break while cutting.
- Again, use the melted chocolate to add 2 small lines on top of each rice krispie treat. Stick the halved pretzels into each line.
- Allow all the chocolate to harden before moving, stacking, or serving.
Storage
- To store: For optimal results, store at room temperature in an airtight container for up to 5 days. Refrigeration is not recommended.To freeze: Freeze in an airtight container or zip-top bag up to 6 months. To defrost, remove from the freezer and allow to come to room temperature for about 15 minutes before serving. You can also speed up the process by microwaving for 15 to 30 seconds to soften.
Notes
- Candy eyes can be found in the baking or cake decorating aisle of your grocery store. You can also purchase them on amazon.
- Don't skimp on the butter or marshmallows - this recipe uses more than what the "box instructions" call for so that you have perfectly soft and chewy rice krispie treats that will last on your counter more than 1 day.
- Use the photos provided in the above post to help you with assembling the decorations.
Nutrition
Want more recipes like this delivered right to your inbox? Be sure to subscribe above and never miss a thing!


Marni says
I was looking for a recipe that would give me very marshmallow-y treats and this is it! They were not dry at all. Also, how cute is a reindeer design just in time for the winter holidays?
Alana Lieberman says
So happy you enjoyed these! They're my favorite rice krispie treat recipe too!